YOLOv4: Run Pretrained YOLOv4 on COCO Dataset
Here we will learn how to get YOLOv4 Object Detection running in the Cloud with Google Colab step by step.
Check out the Google Colab Notebook
Clone and build DarkNet
Clone darknet from AlexeyAB’s repository,
!git clone https://github.com/AlexeyAB/darknet
Adjust the Makefile to enable OPENCV and GPU for darknet
# change makefile to have GPU and OPENCV enabled
%cd darknet
!sed -i 's/OPENCV=0/OPENCV=1/' Makefile
!sed -i 's/GPU=0/GPU=1/' Makefile
!sed -i 's/CUDNN=0/CUDNN=1/' Makefile
!sed -i 's/CUDNN_HALF=0/CUDNN_HALF=1/' Makefile
Verify CUDA
# verify CUDA
!/usr/local/cuda/bin/nvcc --version
Build darknet
Note: Do not worry about any warnings when running the
!makecell!
# make darknet
# (builds darknet so that you can then use the darknet executable file
# to run or train object detectors)
!make
Download pretrained YOLO v4 weights
YOLOv4 has been trained already on the coco dataset which has 80 classes that it can predict. We will grab these pretrained weights so that we can run YOLOv4 on these pretrained classes and get detections.
!wget https://github.com/AlexeyAB/darknet/releases/download/darknet_yolo_v3_optimal/yolov4.weights
Define helper functions
import cv2
import matplotlib.pyplot as plt
%matplotlib inline


def imShow(path):
    """
    Show image
    """
    image = cv2.imread(path)
    height, width = image.shape[:2]
    resized_image = cv2.resize(image, (3*width, 3*height), interpolation = cv2.INTER_CUBIC)

    fig = plt.gcf()
    fig.set_size_inches(18, 10)
    plt.axis("off")
    plt.imshow(cv2.cvtColor(resized_image, cv2.COLOR_BGR2RGB))
    plt.show()


def upload():
    """
    upload files to Google Colab
    """
    from google.colab import files
    uploaded = files.upload()
    for name, data in uploaded.items():
        with open(name, 'wb') as f:
            f.write(data)
            print(f'saved file {name}')


def download(path):
    """
    Download from Google Colab
    """
    from google.colab import files
    files.download(path)
Run detections with Darknet and YOLOv4
The object detector can be run using the following command
!./darknet detector test <path to .data file> <path to config> <path to weights> <path to image>
This will output the image with the detections shown. The most recent detections are always saved to ‘predictions.jpg’
Note: After running detections OpenCV can’t open the image instantly in the cloud so we must run:
imShow('predictions.jpg')
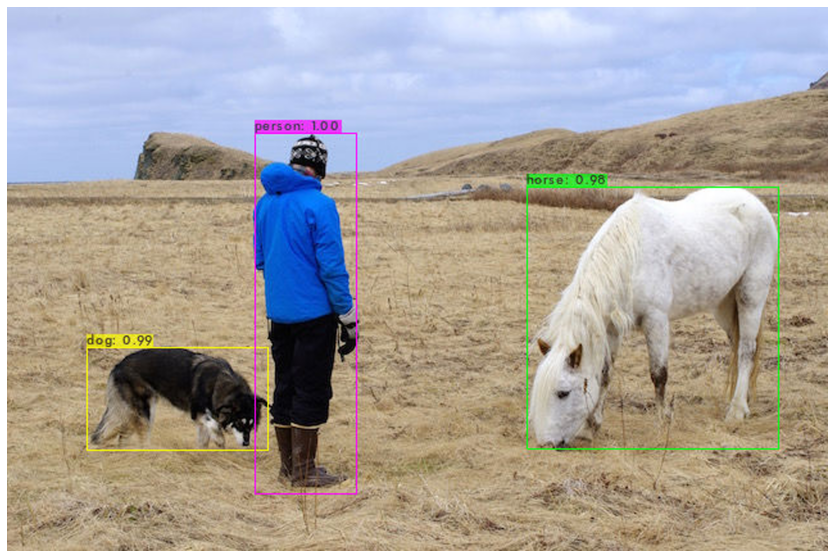
Darknet comes with a few images already installed in the darknet/data/ folder. Let’s test one of the images inside:
# run darknet detection on test images
!./darknet detector test cfg/coco.data cfg/yolov4.cfg yolov4.weights data/person.jpg
imShow('predictions.jpg')
Run detections using uploaded image
We can also mount Google drive into the cloud VM a
from google.colab import drive
drive.mount('/content/gdrive')
# this creates a symbolic link
# so that now the path /content/gdrive/My\ Drive/ is equal to /mydrive
!ln -s /content/gdrive/My\ Drive/ /mydrive
!ls /mydrive
nd run YOLOv4 with images from Google drive using the following command:
!./darknet detector test cfg/coco.data cfg/yolov4.cfg yolov4.weights /mydrive/<path to image>
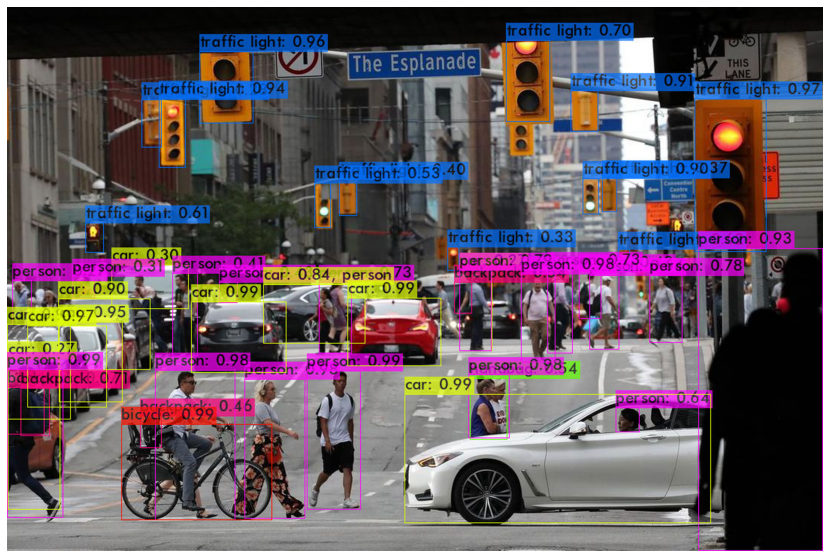
For example, I uploaded an image called “pedestrian.jpg” in images/ folder:
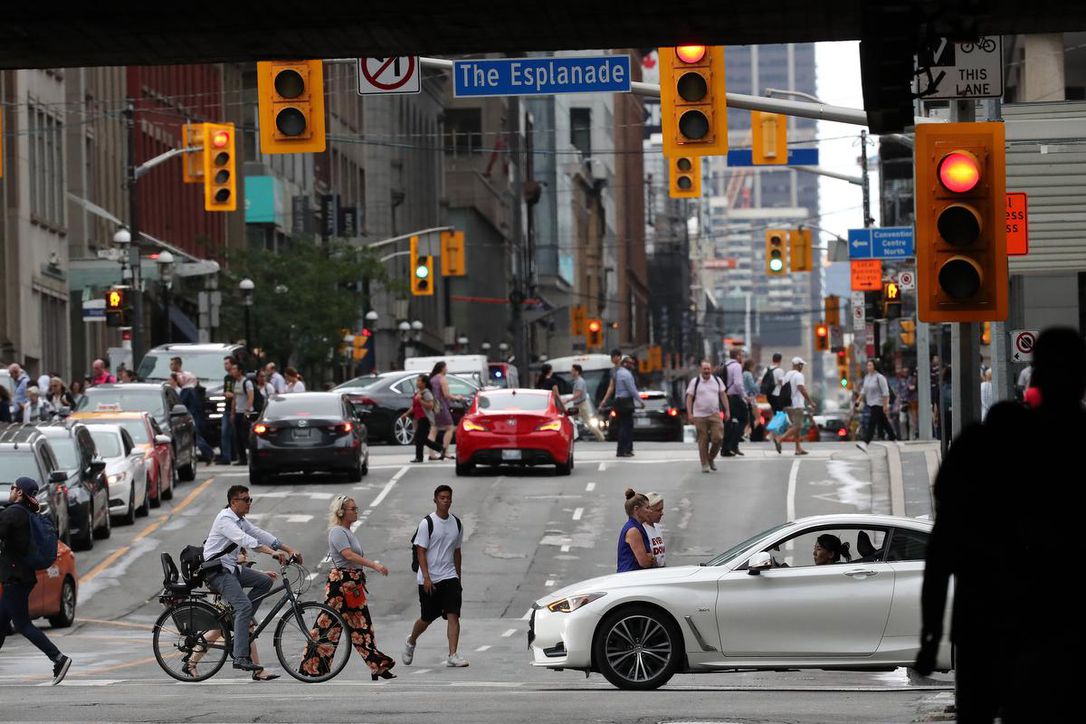
and run detection on it:
!./darknet detector test cfg/coco.data cfg/yolov4.cfg yolov4.weights /mydrive/images/pedestrian.jpg
imShow('predictions.jpg')
Reference
YOLOv4 in the CLOUD: Install and Run Object Detector (FREE GPU)