Running Jupyter Notebook/Lab on a remote server
SSH Tunneling
Also known as port forwarding. I.e. setup a network tunnel (a connection for data to flow) from a local point to remote point.
Example:
ssh username@xx.xx.xx.xx -NL 1234:localhost:12341234:localhost:1234means that any network request you send to port1234in your current system will be automatically forwarded tolocalhost:1234from the remote system.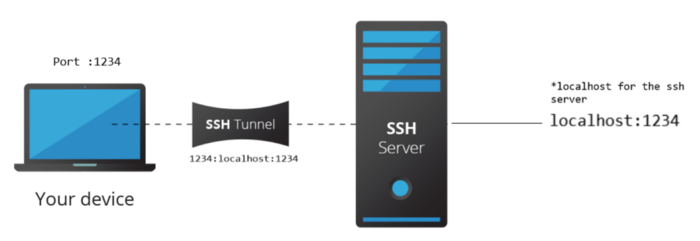
Run Jupyter Notebook on a remote server
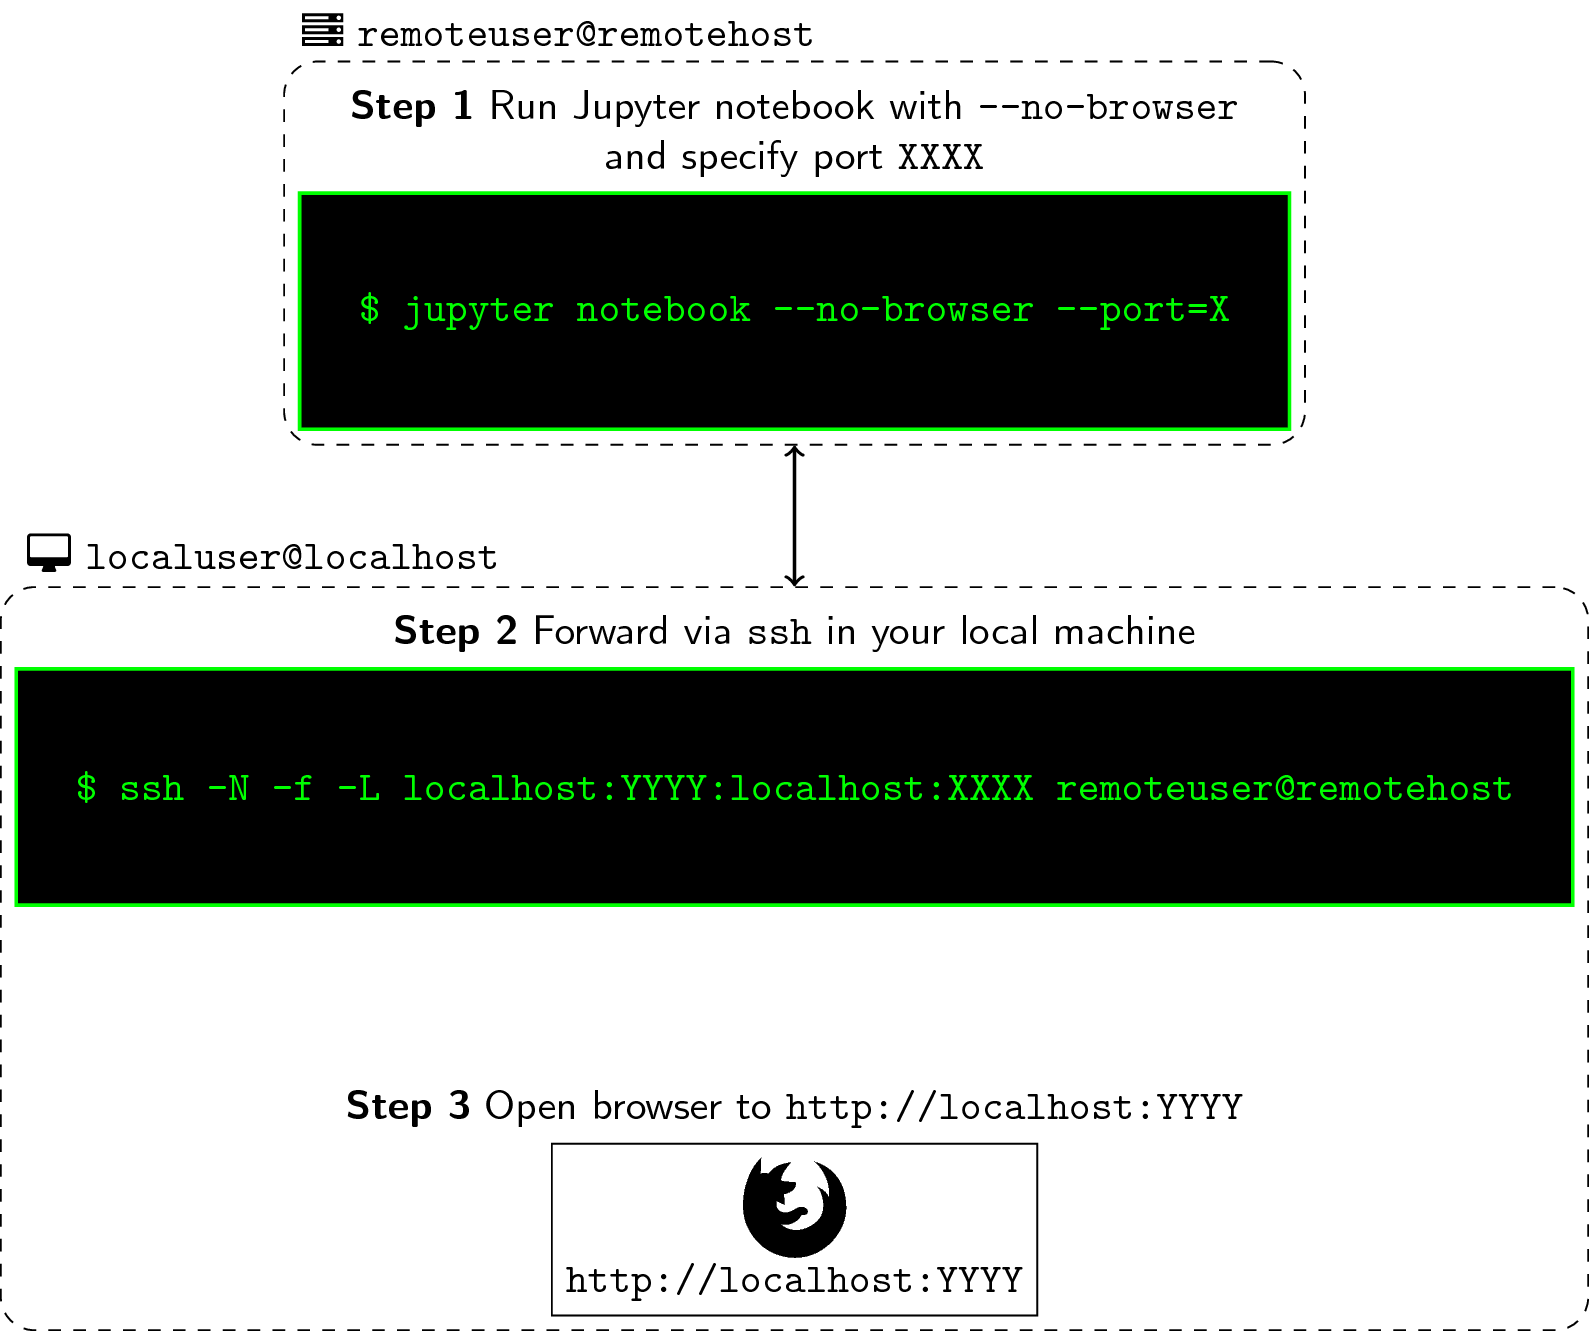
0. Log on the remote server vis SSH
1. Run Jupyter Notebook from remote machine
To launch Jupyter Notebook from remote server, type the following in the remote server console:
jupyter notebook --no-browser --port=<remote_port>
--no-browser: this starts the notebook without opening a browser--port=<remote_port>: this sets the port for starting your notebook where the default is8888. When it’s occupied, it finds the next available port.
Note: Please note the port setting. You will need it in the next step.
2. Forward <remote_port> to <local_port> and listen to it
In your remote, the notebook is now running at the port <remote_port> that you specified. What you’ll do next is forward this to port <local_port> of your local machine via SSH tunneling so that you can listen and run it from your browser.
Type the following in the local machine terminal:
ssh -N -L <local_port>:localhost:<remote_port> <remote_user>@<remote_host>
This opens up a new SSH session in the terminal.
3. Fire-up Jupyter Notebook
To open up the Jupyter notebook from your remote machine, simply start your browser and navigate to localhost:<loacl_port>
Overview
Run Jupyter Lab on a remote server
It’s similar to running Jupyter Notebook. Simply replace notebook with lab.